|
Septic systems are part and parcel of life on a hobby farm where city services are not within reach. One thing that has made life a little better is installing a septic tank riser to make access easier for pumping or inspection. According to the Pros I have spoken with, the best interval to pump you tank is every four years. They went on to elaborate that elections are on the same interval and both tanks and politicians are full of it in that amount of time. If not scheduled, old Murphy (of Murphy’s law fame) takes over and the pumping will need to me done at the most inconvenient time. If you want to pay a guy to dig up the access for you, it will cost you a C-note prior to anything actually leaving the tank. If that sits well with you, well, you probably wouldn't be checking out a DIY site, now would you? So Plan ahead and be ready to install a riser during your next tank pumping. The parts will cost you between $100.00 and $150.00. For the best deal call your local precast septic tank company and ask if they sell riser pipe (by the foot) and riser lids. 24 Inch worked for our system but 20” is another common diameter. Here are three easy steps 1) Dig to expose the lid 2) Measure from the tanks surface to the highest point on the surrounding grade and add two inches. 3) Order the lid and pipe to fit (they will cut for you) Install and backfill. Tips: use spray foam on tank top to seal where the pipe contacts the tank, leave concrete lid in place, in cold weather climates, install fiberglass insulation in pipe cavity between the lids. Questions? Feel free to post them below in comments. Thanks and happy digging! The exterior siding of your home is the first line of defense in keeping the outside out. The importance of maintaining this barrier to the elements cannot be overstated. Over time repairs are inevitable especially if you have a fun filled, active lifestyle. In cold weather, vinyl siding becomes less resilient and susceptible to breakage when a snowball flies astray from its intended target. We are not here to point fingers or assign blame so if your damage is from an errant golf ball or an abandoned utility connection, we'll discuss the fix here. The most difficult part of this job is to source matching vinyl siding. Often you will need to remove the current piece in order to determine the manufacturer and the color of the siding (printed on the nail strip). Matching the manufacturer is important because various manufacturers offer different colors and simulated wood grain patterns. If you know the home builder give them a call to see if they could point you in the right direction. Often the installation company will source their own material and you may have to get the material from them if there is not a local wholesaler. You may need to put on your detective hat and call around to roofing and siding supply companies in your town. As a last resort, try asking a local supplier representative to "swing by" to identify the siding. They will often do this for free when they are in the neighborhood. This is helpful because they can ID their products and often those of competitors. Now that you have the parts, let's get to the steps to replacement. Here are a few things to keep in mind with vinyl siding. Weatherproofing Install siding and accessories over a flat surface. Always install siding over a rigid sheathing. Vinyl siding is not a watertight material. Install a weather-resistant barrier, like House Wrap and flash around all windows and doors before installing vinyl siding. Cutting There are three recommended ways to cut vinyl siding: score the panel with a knife or vinyl blade and bend the panel back and forth. Use tin snips to fit panels around windows and doors. For cross cuts, use a circular saw with a plywood blade in the reverse position. Installation Always leave room for expansion and contraction into receiving channels like outside and inside corner posts, and J-channel. If the temperature is above 40°, leave 1/4"; if the temperature is below 40°, leave 3/8". When installing horizontal vinyl siding panels 12' 6" in length or shorter, overlap the factory notches 1" to 1-1/4" (depending on the temperature). In the "field" you can stagger and overlap the panels OR use H-seams, the choice is yours. In the photos you will see that instead of using a vinyl siding removal tool, I bent a 16D vinyl coated nail that I use as a substitute. This is OK for small jobs but if you have much to do, I'd spend the few bucks for the right tool. Fastening Always nail in the center of the nail slots: 16" on center for siding; 8" to 12" for accessories. I like using hot dipped galvanized roofing nails that are 1-1/4" in length. In the photos below, you will notice I used zinc screws on the top piece I replaced. This is not recommended in a high wind area. It worked for me because it was a small job and I had a hard time swinging the hammer with the top piece of siding in my back swing. Do not over drive your fasteners. Always leave 1/8" to 1/16" between the nail head and the wall surface to allow for movement when the panel expands and contracts. The layout of your farm is one of the most important decisions you will make. Stephen Covey said it best, "Begin with the end in mind". We found it valuable to take a sheet of graph paper and pre-plan our home site and locations of outbuildings. This plan affects all future land use issues on your place. Some of the factors that should be considered are the following;
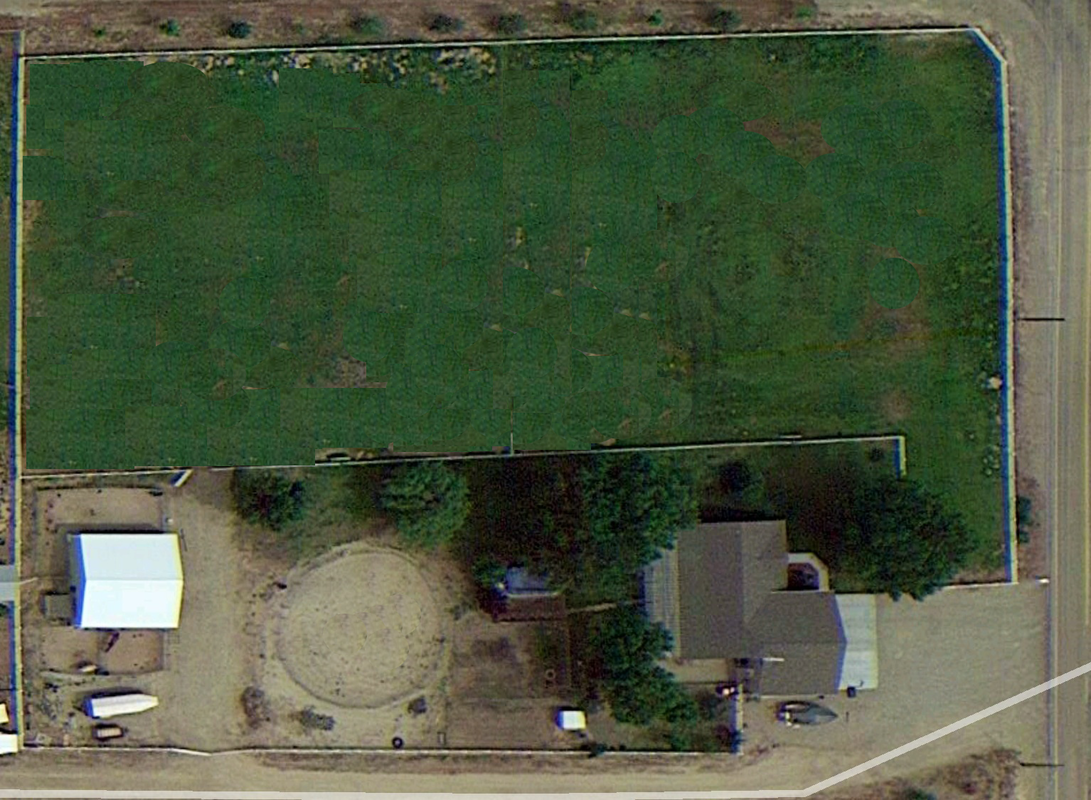
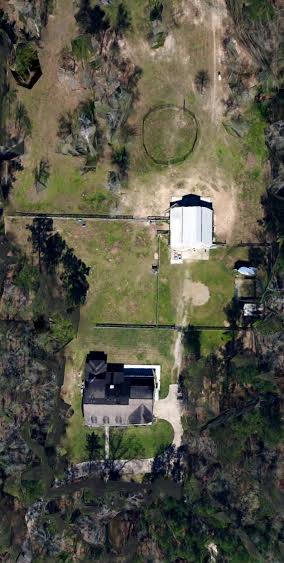
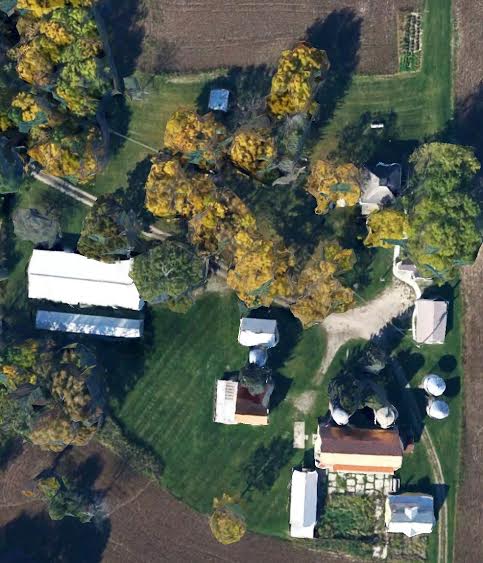
Below are three plot plans old and new. Tips: If building new, a plot plan is part of your building permit and septic system application. Make copies and start planning. Don't forget the dry lot. Taking the horses off of the pasture allows for regeneration and helps you manage your livestock's weight. Check out the layouts below and read the caption for more details. Welcome to my inaugural blog post intended to share information and techniques used in our many Do It Yourself (DIY) projects. Living on a hobby farm gives you all the usual home repair and maintenance projects with the addition of looking out for your animals and landscape maintenance on a large scale. If your projects have included working on an initial poor design, fixing past sloppy workmanship, worn-out parts, or needing something new, then join me on this blog to save yourself the time and effort I have already spent learning this stuff.
In this blog, I tap the knowledge of family, friends, craftsmen, and specialists in many areas who have become my prized resources and share this with you. I will also share the mistakes I've made in hopes to save you that frustration. We have done some large projects and tons of small ones but like our children, our land didn't come with an owner's manual. Having been in the building industry for many years, I know that products and methods change over time and we can’t know it all. That’s why I keep my “go to” pro list and I am not afraid to use it. Sometimes that tactic actually works! I envision this place being like an e-friend where you can get inspiration and maybe a few ideas to help make your project better. If you are another DIYer or hobby farmer, please join me for my weekly posts of projects and hopefully a laugh or two. |
AboutThis blog is for the hearty souls who have fled the subdivisions to live on their own patch of heaven. Having land means having lots of projects. Inspiration often comes from other properties We put this blog online to help you build and maintain your own paradise. AuthorGus and Family have made a home on their hobby farm since 2001. They've made plenty of mistakes and will help you avoid the same and others. 
Archives
February 2015
Categories |
 RSS Feed